Using a trusted Certificate Authority with FSIS
FAST Search for Internet Sites (FSIS) uses certificate-based security for internal communication, as well as for talking to external applications who want to query the index.
The default installation optionally creates and configures a self-signed CA, and issues all necessary certificates. This is handy for development and test installations, when it might not be possible to use a PKI infrastructure. Or simply just when you don’t want to flesh out the money for a trusted root CA.
However, you don’t want to have your production environment running on self-signed certificates. You want to use a proper, trusted, CA.
If you opt to use a trusted CA right from the get-go, when you first install FSIS, the process for doing so is fairly well-documented. But if you want to migrate an existing installation, going from using the self-signed certificates to relying on a trusted CA, there’s at least one caveat you should know about. In the documentation about renewing certificates, and changing the CA, there’s a small note saying:
The procedure assumes that you do not change the name of the CA. SecurityConfig -useNewCerts offers no way to update the CA subject name in the configuration. The name of the CA is used for authorization throughout the system. If it changes, all configuration files referencing this name on all hosts must be updated and all the hosts must be restarted.
This is crucial information, because if you update the CA, it’s very likely that the subject name of the new certificate does not match the old from the self-signed version. Other than that, the process of moving to a trusted CA is straight-forward. Put the new certificates in place, run SecurityConfig with the -useNewCerts options, and restart the FSIS service.
This is just what I did yesterday. Unfortunately for me, after deploying the new certificates, my client application got an Access Denied response, or at best a “The credentials supplied to the package were not recognized”. On my FSIS node, I set up a trace of the communication, but that only told me that the connection was dropped. After lots of debugging, I luckily stumbled over the note in the documentation.
So I needed to update those “configuration files”. As the author wasn’t kind enough to specify which these were, I ran a string search over the whole FSIS install directory. The files that I needed to update were the Node.config files in FSIS’s AdminNode and ImsNode services:
|
1 2 |
C:\Users\[My FSIS user]\AppData\Local\FSIS\Nodes\Fsis\AdminNode1\Node.config C:\Users\[My FSIS user]\AppData\Local\FSIS\Nodes\Fsis\InteractionEngineNode1\Node.config |
Depending on your setup, you might have several such files, spread over several machines. In any case, those files contain the following XML node:
|
1 |
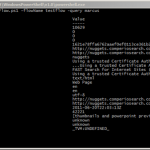
<add key="IssuerAuthorizationManager.AuthorizedIssuer" value="CN=fsisIssuer@MY_HOSTNAME" /> |
After updating the CN name, and restarting the FSIS service, my client application finally started to work as expected.
UPDATE
The procedure above; updating the InteractionEngineNodeX\Node.config, will of course only affect the settings for that particular node. After some more digging around, I’ve found out how to make the changes kick in also for new nodes added later on.
The template file for the IMS Node.config files lives here (yes, no file suffix):
|
1 |
%FSIS_HOME%\Resources\Templates\InteractionEngineNode |
This file contains the following line:
|
1 |
<add key="IssuerAuthorizationManager.AuthorizedIssuer" value="${Managed.CertificateIssuerName}" /> |
You can replace ${Managed.CertificateIssuerName} with something like CN=fsisIssuer@MY_HOSTNAME, but even better is to replace the actual variable being expanded. It is defined under the <appsettings> here:
|
1 |
%FSIS_HOME%\Host Controller\HostControllerService.exe.config |